Whenever developers scale up and down the number of containers in the data center, their size should remain limited near the absolute occupied level. A multistage Docker builds enable organizations to avoid unnecessary development tools and remove them if they are already present in the containers' ecosystem. They can minimize containers' capital size, but that process is hard to plan and execute. However, every Dockerfile contains necessary developers' guides on building a containerized Docker application, making their work more manageable. Firstly Docker also contains sets of its containers' snapshots and takes them in a configured time, which offers developers some templates and other resources required to execute those containers. Additionally, every container's base image is more like a freshly installed OS.
However, every time Docker builds an application or takes a snapshot or a picture of containers, it creates an artifact to store all process-related data. The main reason behind the multi-staging docker build is to allow developers to evaluate their Dockerfiles and other resources to maintain the application throughout without even thinking about another enterprise's IT infrastructural needs. Moreover, before setting up an application for multistage, making a strategy for executing processes, assessing benefits and drawbacks, and ensuring everything with Docker guidelines is necessary.
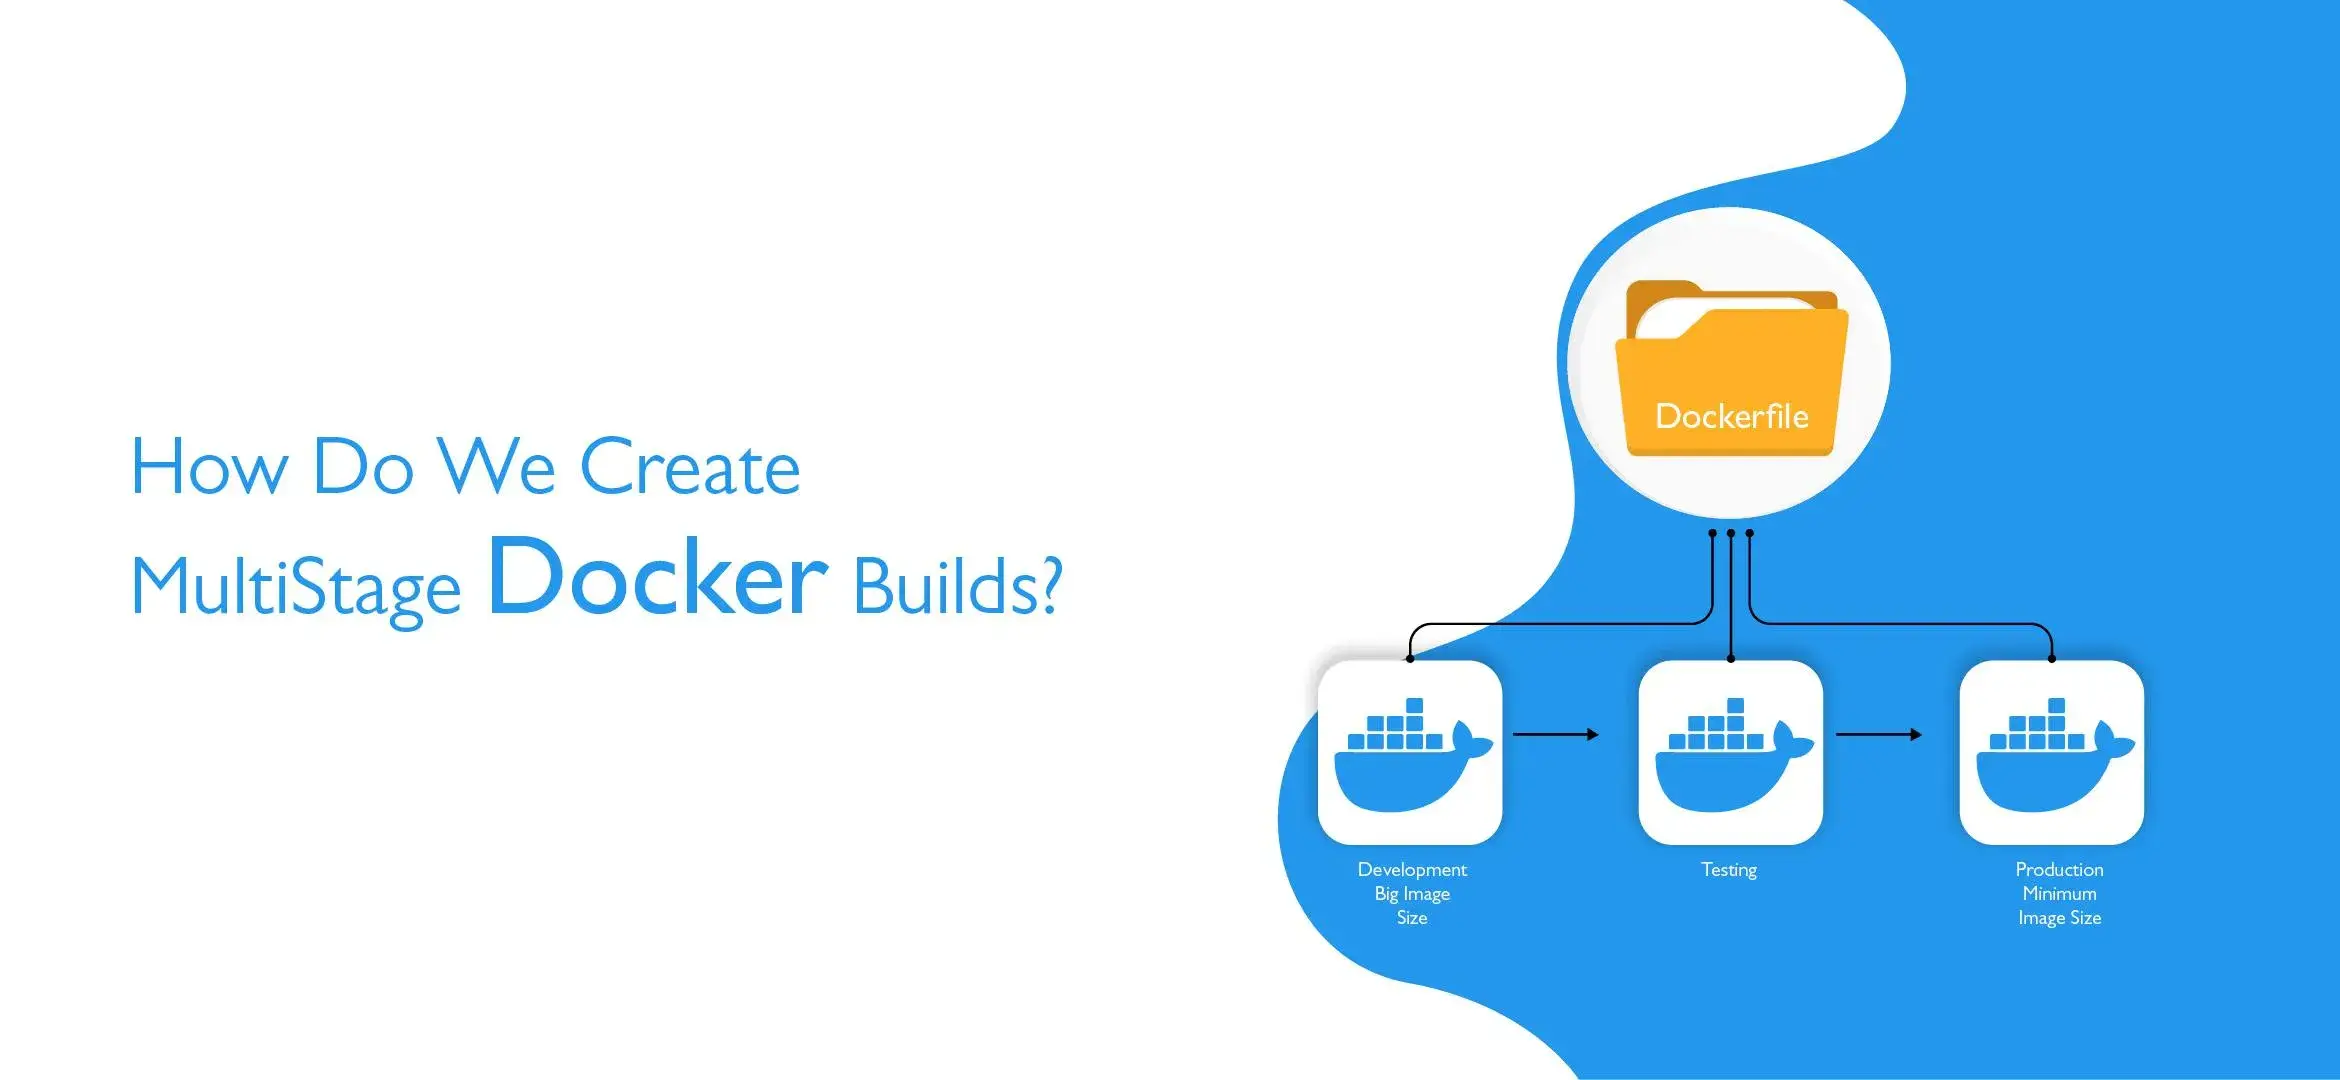
What Do You Mean by This Docker Multistage Build?
It is a step-by-step process of designing a Docker image, and each stage contains specific tasks for adding and removing development tools. These tools are concrete to the base image of Docker containers and are necessary to use during the final compilation process. To reach there, developers must know the script of the whole building and compilation process, which includes these steps as an essential part of a CI/CD pipeline implementation. Primarily, the multistage processes are used to align and clarify the whole build after the development. Once the target application is designed from the given image, developers can roll back the building tools to reduce the capital of the shape and image size. Furthermore, another use case is while thinking about compiling a library shared by several applications, built processes ensure to add the newly compiled library into the final executable application/build. Moreover, just a single application can use the compiled library rather than multiple applications to avoid performance bottlenecks.
Advantages of A Multistage Docker Build/Image:
- Enables developers to automate the application building process through particular compilation.
- Allows creating image versions that can work with any OS versions and process dependencies.
- It gives a chance to create scripts to build images containing technical parameters. I.e., setting switching.
- Better security (by allowing using pre-staged verified local container images) and caching capabilities
- Because of caching, the typical build can finish its work more petite than usual by pulling cached images and utilizing them as many times as possible.
- Ultimately provides flexibility
Disadvantages of A Multistage Docker Build/Image
- Its flexibility also acts as a disadvantage by bringing complexity to scripting and maintenance processes.
- Dependencies' isolation is necessary (needs extra care) to maintain the target release of different versions.
- We need to remove comments to lighten the final file and achieve better outcomes.
- During troubleshooting time, a document without comments can create difficulties for developers.
Steps to Create Multistage Docker Builds:
Here, we will show the most used approach for creating multistage Docker builds using React and Nginx. The dependencies used in this example can be outdated with time but definitely can be used to create multi-staging and probably the faster approach. That is all we can say, so let's get started with the development steps.
1. Cloning Repositories:
Yes, it is possible to clone any application and evaluate the multi staging of the project by adapting them with Dockerfiles. There are possibilities that many projects use different Dockerfiles, but here will talk about the React app compatible with the common Dockerfile that was used before to implement and operate it.
2. Create the Docker Image:
Consider the docker file is the same one that creates replicas of a current working folder within the Docker, installs convenient dependencies, and operates the application. Note: Make sure the Dockerfile you're using must be placed in the project where the root lies. The common docker file example:
|
# Pulls the official image
|
|
FROM node:13.12.0-alpine
|
|
|
|
# Sets the working dir
|
|
WORKDIR /app
|
|
|
|
# add `/app/node_modules/.bin` to $PATH
|
|
ENV PATH /app/node_modules/.bin:$PATH
|
|
|
|
# Install all the dependencies
|
|
COPY package.json ./
|
|
RUN npm install --silent
|
|
|
|
# Add the App Code
|
|
COPY . ./
|
|
|
|
# Script that starts the app
|
|
CMD ["npm", "start"]
|
So, this file can be used to optimize the container's size by selecting required files to copy, and you can exclude them by listing them in a file named # .dockerignore. Now, it's time to build the container: Docker builds –f Dockerfile –t react-b: latest. Furthermore, to run the container, you can use the following command:
| -it \ |
| --rm \ |
| -v ${PWD}:/app \ |
| -v /app/node_modules \ |
| -p 3001:3000 \ |
| react-b:latest |
3. App Optimization Using Nginx:
Firstly the reason behind optimizing Docker image is definitely regarding production purposes. For example, we have an image containing 400 MB of storage capacity and uses only 250 MB of RAM, while other space is ideal. Therefore, there is a necessity for creating a multistage of docker builds, which further helps in optimizing the performance of images using the size and RAM at an absolute level during the process. Now, enable the builder mode of the Docker ecosystem to define multi-stages in a single Docker build. If a docker file contains multiple FROM keywords, the next one will be added directly to the deployed container. Existing Dockerfile Modification: This docker file modification includes:
- Replacement of the CMD ["npm", "start"] by RUN npm run build
- "RUN npm install – silent" replaced by "RUN npm install --silent—only=prod"
Moreover, this modification is further integrated with optimized production code, which creates a Build folder.
4. Adding Multistaging using Nginx:
Now, it's time to multistage the Dockerfile. For this, we need to run our modified file in the Nginx container. To create multi staging inside the Nginx container environment with the help of the Nginx image, you need to copy every necessary present Nginx file. Now, create a Nginx.conf file pastes the following code in it: server { listen 80; location / { # This would be the directory where your React app's static files are stored at root /usr/share/nginx/html; try_files $uri /index.html; }} Add a stage to a dockerfile: Modify the existing dockerfile by adding the "as" keyword for stagging purposes. For example: FROM node:01.10.1-alpine as builder. This image command represents a new stage for Docker and can be utilized further to add other stages. Plus, we can copy required files and folders from it using command: COPY –from*=<stage_name>. Now, we can see the clear picture of multi staging process of Dockerfiles is actually getting in shape. At last, add all created Nginx Stages in the production code, and the process of multi stagging is done. ### Add to your existing Dockerfile ... # ------------------------------------------------------ # Production Build # ------------------------------------------------------ FROM nginx COPY nginx.conf /etc/nginx/conf.d/default.conf COPY --from=builder /app/build /usr/share/nginx/html // this represents all builder files are being copied to app build inside the Nginx Folder. So, this is all that is required to know about multi staging process for Docker builds, but you can also go further to create new containers and, of course, add new features and multi stage them.
Conclusion:
Firstly there are various multistage docker builds' benefits that you can leverage in your business IT infrastructure. Secondly a point to be noted, this multi-stagging is not necessary for all Docker builds, which means, only limited to specific Docker use cases. Every application that contains an automated CI/CD system and different sized docker images can utilize this process to make their roll-out even faster than usual. Contact us today to get the best DevOps with Cloud computing solutions and services in India for your thriving business.
 EdTech
 FinTech
 Logistics
 Healthcare
 Automobiles
 Manufacturing
 Telecommunications
 InformationTechnology